Hanoi will simultaneously surprise, charm and chew you up. Founded along the Red River, Hanoi was named Thang Long (soaring dragon) by Emperor Ly Thai To in 1010. Over a thousand years of war, natural disasters and new administrations, the city grew from swamplands into the charismatic capital it is today. Take in details of the ancient architecture, battle the barrage of millennials on motorbikes and drink fresh bia hơi in the Old Quarter. Here are 11 must-see stops in Hanoi.
Ho Chi Minh Mausoleum
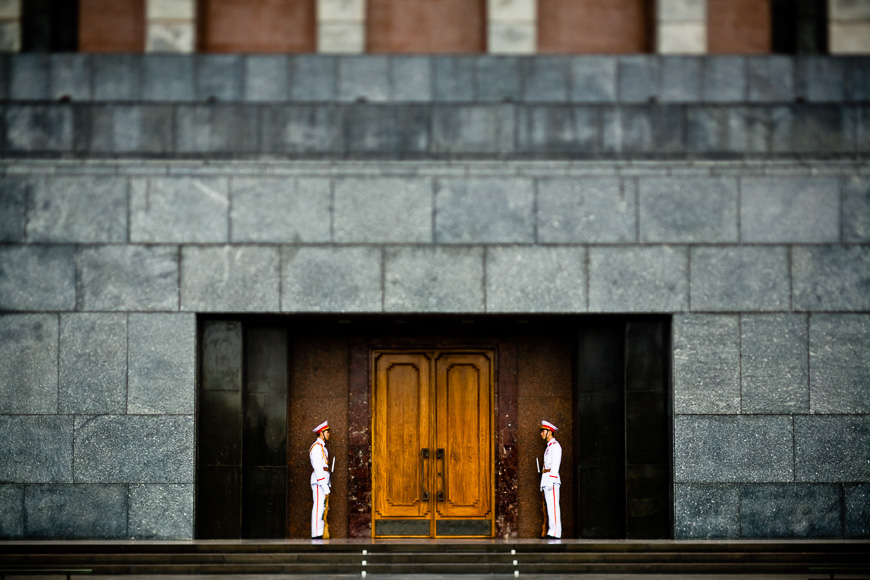
Soldiers stand guard the entrance of Ho Chi Minh's Mausoleum.
This commanding construction was built from 1973 to 1975 to house the embalmed body of Vietnam’s greatest political leader, Hồ Chí Minh. Visitors and Vietnamese queue for hours every morning to pay their respects to the cadaver, dressed in a khaki wardrobe and encased in a glass sarcophagus.
Admission: 35,000 VND
Hours: 8am - 11am, Tue-Thu, Sat-Sun (December to September) last entry at 10:15am
Address: So 1, Hung Vuong, Dien Bien, Ba Dinh
One Pillar Pagoda
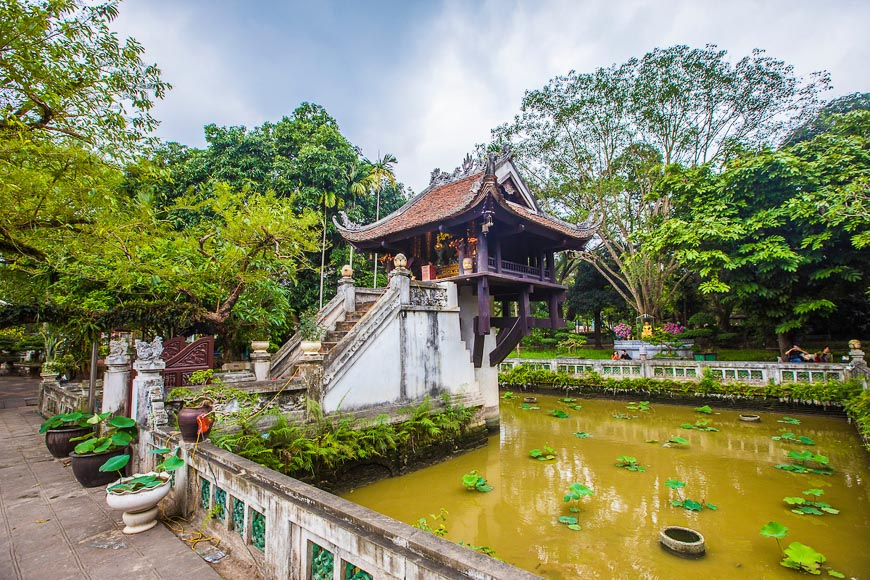
The unique one pillar pagoda in the middle of a lotus pond.
This Buddhist wooden pagoda was built in the middle of a lotus pond on a single stone pillar by the Emperor Ly Thai To in 1049. Archives suggest it was built in honor of the Goddess of Mercy, who answered the Emperor's prayers for a male heir. The structure is designed to resemble a lotus flower blossoming from muddy waters, a symbol of purity in Buddhist philosophy.
Admission: 25,000 VND
Hours: 8am - 11:30am everyday, and 2pm - 4pm, Tue-Thu, Sat-Sun
Address: Chua Mot Cot, Doi Can, Ba Dinh
The Old Quarter
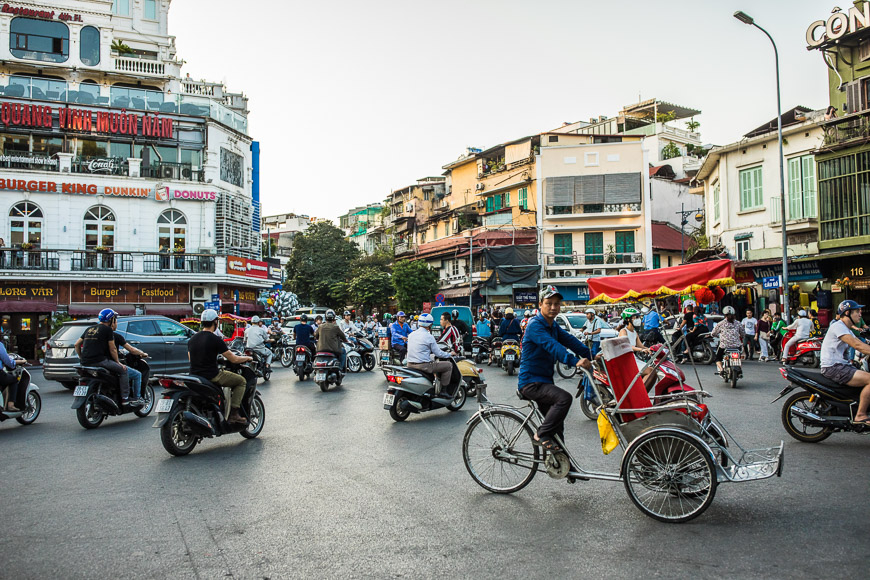
At the top of Hoan Kiem Lake, Dinh Tien Hoang 'roundabout' is a great starting point for exploring the alleys of the Old Quarter.
Hanoi’s historic Old Quarter is a single square kilometre comprised of 36 streets. Since the 15th century, each street has been home to artisans and craftsmen who traded in the specific merchandise for which their street was named. Today, the charm of these streets still remains. Prepare to marvel as you wander from silver street to bamboo street, silk street to decoration street, all within a stone's throw of each other.
TIP: At night, head down to bia hơi corner (the intersection between Ta Hien and Luong Ngoc Quyen) to sample sensational street food and bargain brews.
Admission: Free
Hours: 7am to midnight
Address: North of Hoan Kiem Lake
Hanoi Opera House
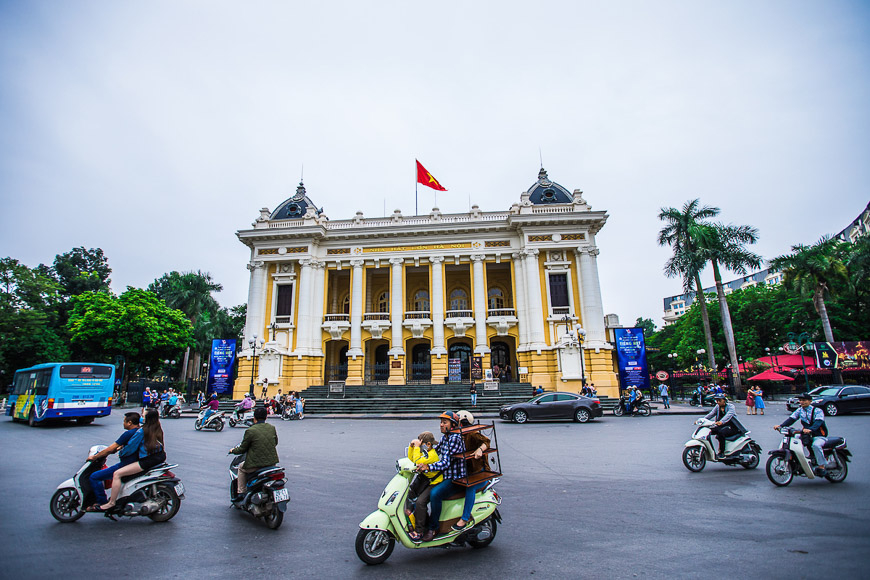
The Opera House is at the edge of Hanoi's French Quarter, where a few colonial buildings have been well preserved.
Constructed at the turn of the 20th century, this beautiful colonial building is the largest theater in Vietnam. After nearly 100 years of operation, the Opera House was carefully refurbished in 1997 and equipped with state-of-the-art facilities. Today the venue attracts renowned performers, productions and musicians.
TIP: Culture lovers should book tickets to see 'My Village' at the Opera House. This impressive showcase combines acrobatics, traditional dance and music.
Admission: 300,000 VND
Hours: Check the website for performances
Address: So 01, Trang Tien, Hoan Kiem
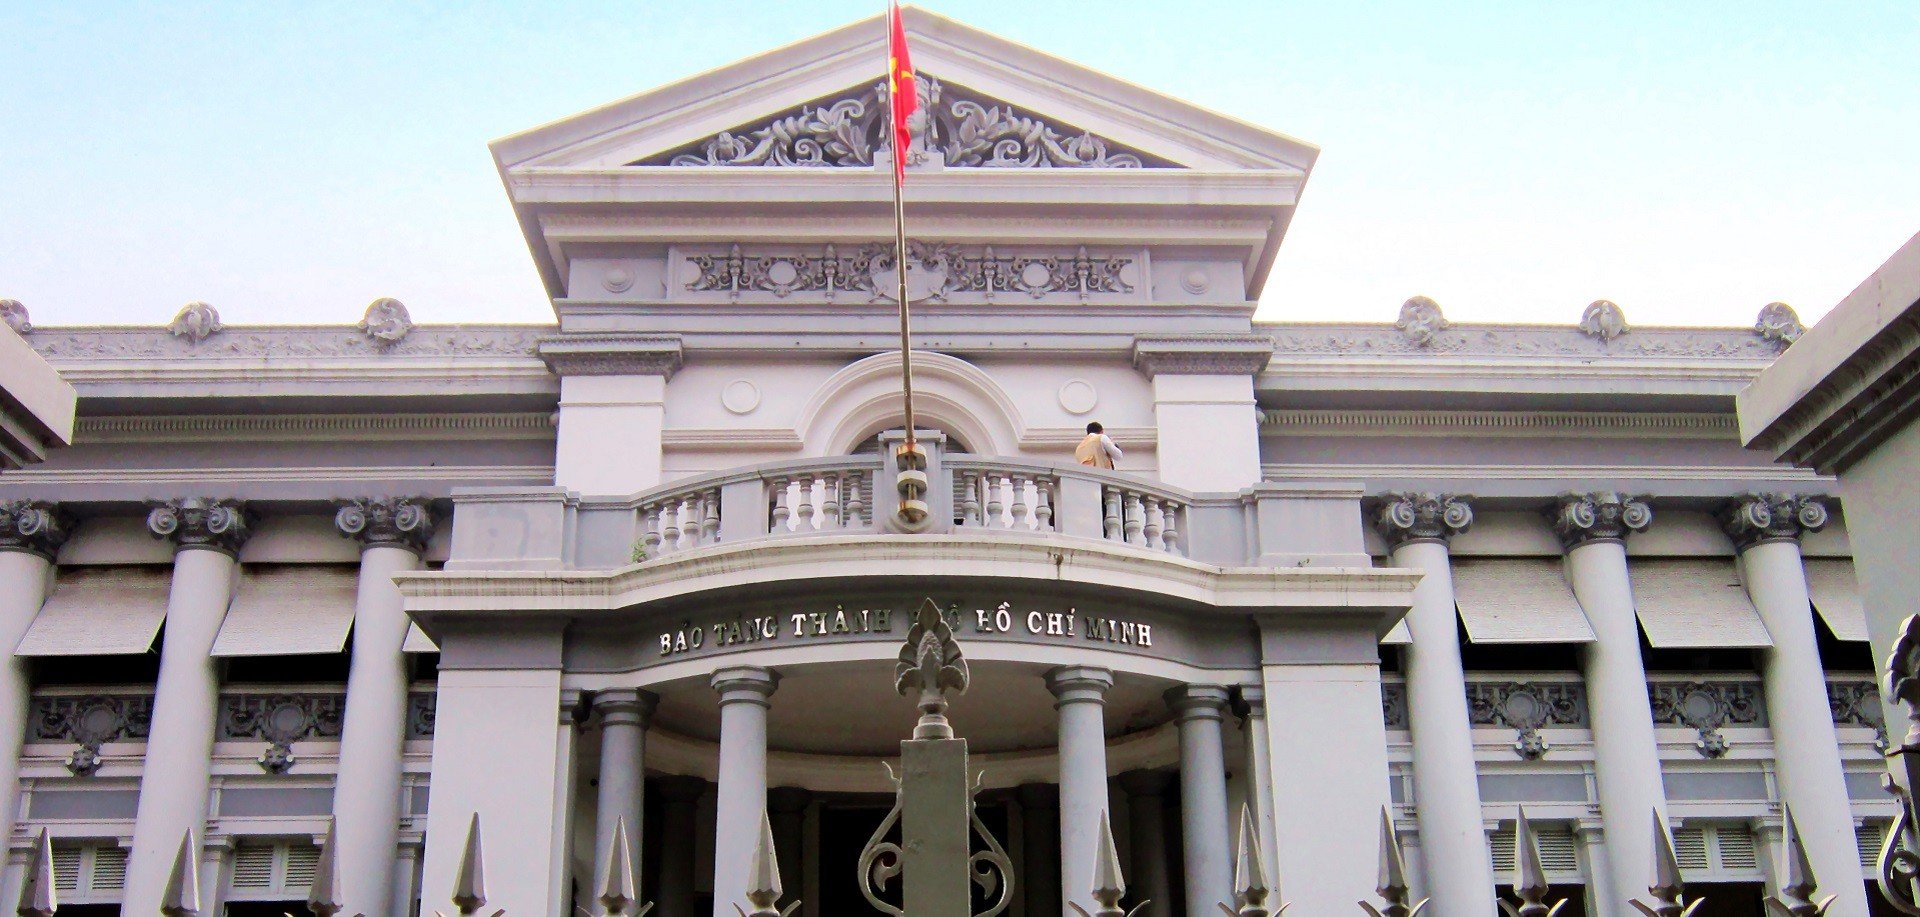
Vietnamese Women's Museum

This museum boasts a floor on textiles of ethnic groups, women's crucial role in wartimes and even their practices as mediums of the 'Mother Goddess' worship.
The Vietnamese Women’s Museum is one of the most modern museums in Vietnam. Housing a series of excellent exhibitions presenting artefacts, costumes, crafts, memoirs,and photographs from the past 100 years, the museum reveals the pivotal role of Vietnamese women in their country's history and society.
Admission: 30,000 VND
Hours: 8am - 5pm, Tue-Sun
Address: 36 Ly Thuong Kiet, Hang Bai Ward, Hoan Kiem
The Water Puppet Theatre
Live music is always performed alongside the puppeteering with traditional instruments and delicate vocals.
Dating back to the 11th century, water puppet performances are ideal for light entertainment and insight into Vietnamese folklore. Wading around in waist-deep water holding bamboo poles, puppeteers operate the lacquered wooden characters from behind a screen, reenacting scenes from rural village life.
Admission: 100,000 VND
Hours: 3:30pm, 5pm, 6:30pm, 8pm, 9:15pm every day, and an additional performance on Sundays at 9:30pm
Address: 57b Dinh Tien Hoang, Hoan Kiem
Hoan Kiem Lake

Turtle Tower rests at the centre of 'the Lake of the Restored Sword.
Legend says Emperor Ly Thai To was gifted a magical sword by a giant golden turtle who lived in the lake in order to defeat the Ming dynasty. Once victorious, Ly Thai To gave the sword back to the turtle who dove down to return the sword to the gods. Hoan Kiem Lake is admired for its beauty as well as insight into the daily life of Hanoians. Watch locals practicing their daily exercise and Tai Chi routines in the gardens by the water's edge.
Admission: Free to the general public
Hours: Open all day
Ngoc Son Temple
The Ngoc Son Temple, or The Temple of the Jade Mountain, is situated on a small tree-sheltered island on the north side of Hoan Kiem Lake. Connected by a stunning scarlet bridge, this classic Vietnamese structure was built in honour of the intellectual scholar Saint Van Xuong, and national hero General Tran Hung Dao. In 1884, the Confucian scholar made a series of renovations to the site, including adding parallel sentences (câu đối) or word puzzles to the walls.
Admission: 20,000 VND
Hours: 7:30am - 5:30pm, every day
Address: Hoan Kiem Lake
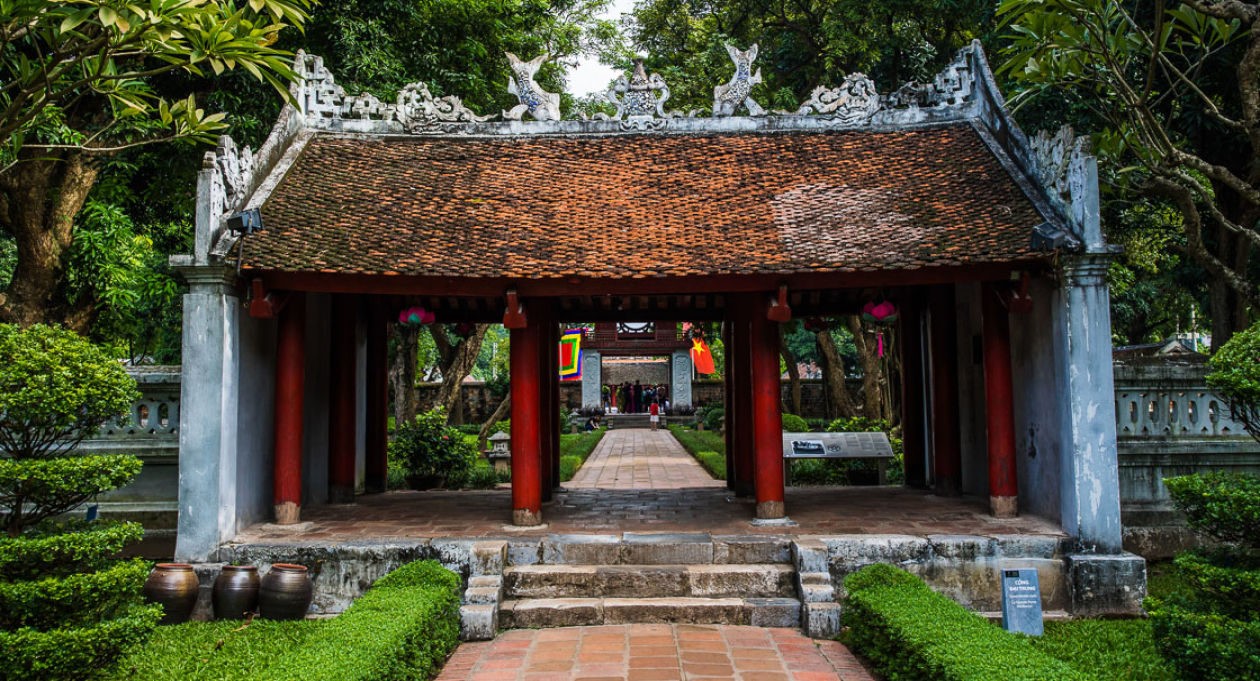
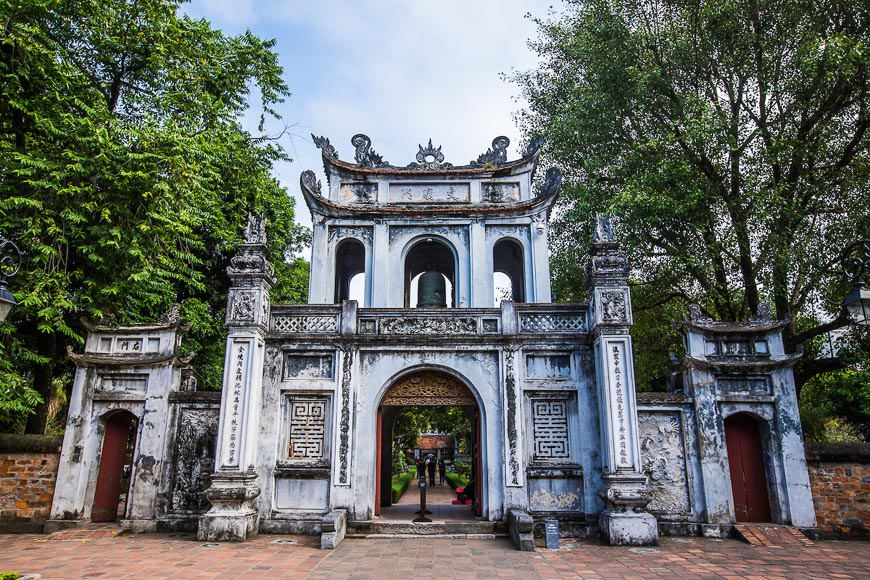
Temple of Literature
The main gate of the nation's oldest university, be sure to visit during lunch time to avoid crowds.
Built by Emperor Ly Thanh Tong during the Ly dynasty, the Temple of Literature (Văn Miếu in Vietnamese) was erected in honour of the philosopher Confucius and his disciples in 1070. In 1076, it became home to Hanoi’s first university, Quốc Tử Giám. The site is one of the oldest in Hanoi and a national symbol of Vietnamese education and architecture. Today, the temple houses five court yards, records of Vietnamese scholars, and statues of turtles which are said to bring students good luck in their exams.
Admission: 30,000 VND
Hours: 8am - 5pm, from November until March; 7:30am - 6pm for the rest of the year, Tue-Sun
Address: 58 Quoc Tu Giam, Dong Da
Museum of Ethnology
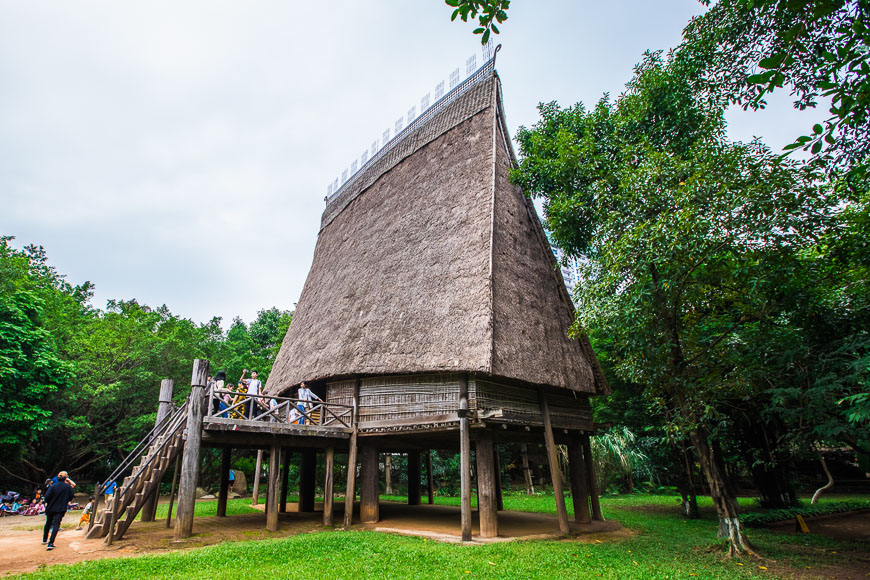
The gardens feature traditional structures, including the communal houses of the Bahnar or Giarai ethnic groups which can reach up to 30 metres high.
This amazing museum examines the everyday life of Vietnam's 54 ethnic minorities. Designed by ethnic Tay architect Ha Duc Linh and French architect Veronique Dolfus, the museum hosts three main exhibition areas. Exhibitions display cultural costumes, handicrafts, videos and artefacts; while the outdoor space showcases impressive life-size replicas of ethnic architecture.
Admission: 40,000 VND
Hours: 8:30am - 5:30pm, Tue-Sun
Address: Nguyen Van Huyen, Nghia Do, Cau Giay
Saint Joseph's Cathedral
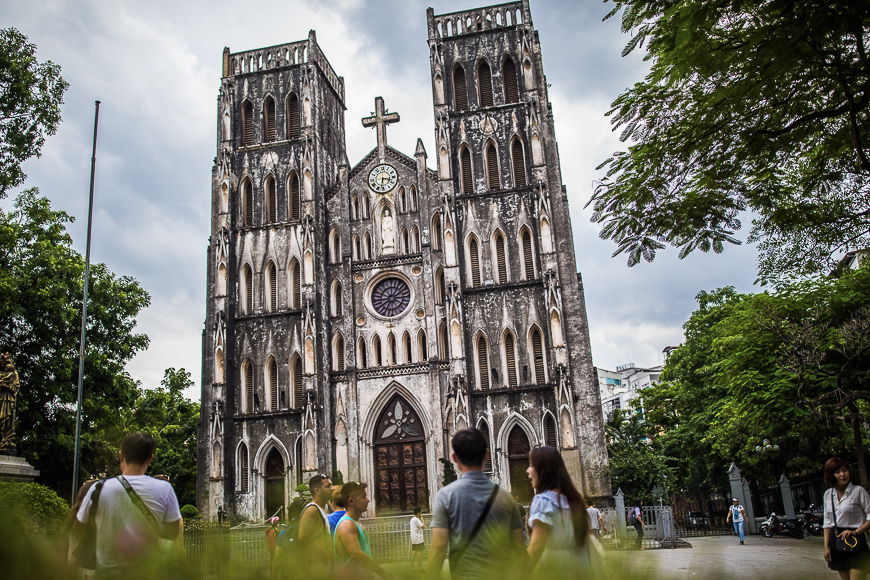
The cafes by the Cathedral are a perfect spot to watch the bustle of Hanoi.
Saint Joseph’s Cathedral (also known as Hanoi Cathedral), was built on the site of the Bao Thien Tower, which was the most famous landmark in the capital during the Ly Dynasty. The architect was inspired by the Neo-Gothic style of the Notre Dame de Paris. When visiting, expect to see a multicultural crowd of worshippers and plenty of Vietnamese newlyweds having romantic photo shoots.
Admission: Free
Hours: 8am - noon, 2pm - 6pm, every day
Address: 40 Nha Chung, Hoan Kiem
Source: Vietnam Tourism
Last update: Thursday October 09, 2025
Travelers from around the world are falling in love with Vietnam — and not just for its stunning landscapes, delicious cuisine, and rich culture. Many of them are also raving about the smooth and supportive experience they’ve had with our Vietnam visa help services.
Whether you're a first-time visitor or a frequent explorer of Southeast Asia, obtaining the right visa is crucial for a worry-free trip. Based on countless Vietnam visa service reviews and real customer testimonials, we've identified the top 5 reasons why travelers consistently rate us among the best Vietnam visa services available.
1. Fast and Hassle-Free Processing
One of the most common things travelers highlight in our Vietnam visa service reviews is our speed. In a world where travel plans can change in an instant, speed and reliability matter.
We offer:
Express processing for urgent travel needs
E-visa assistance with step-by-step guidance
Airport services with smoothly transit
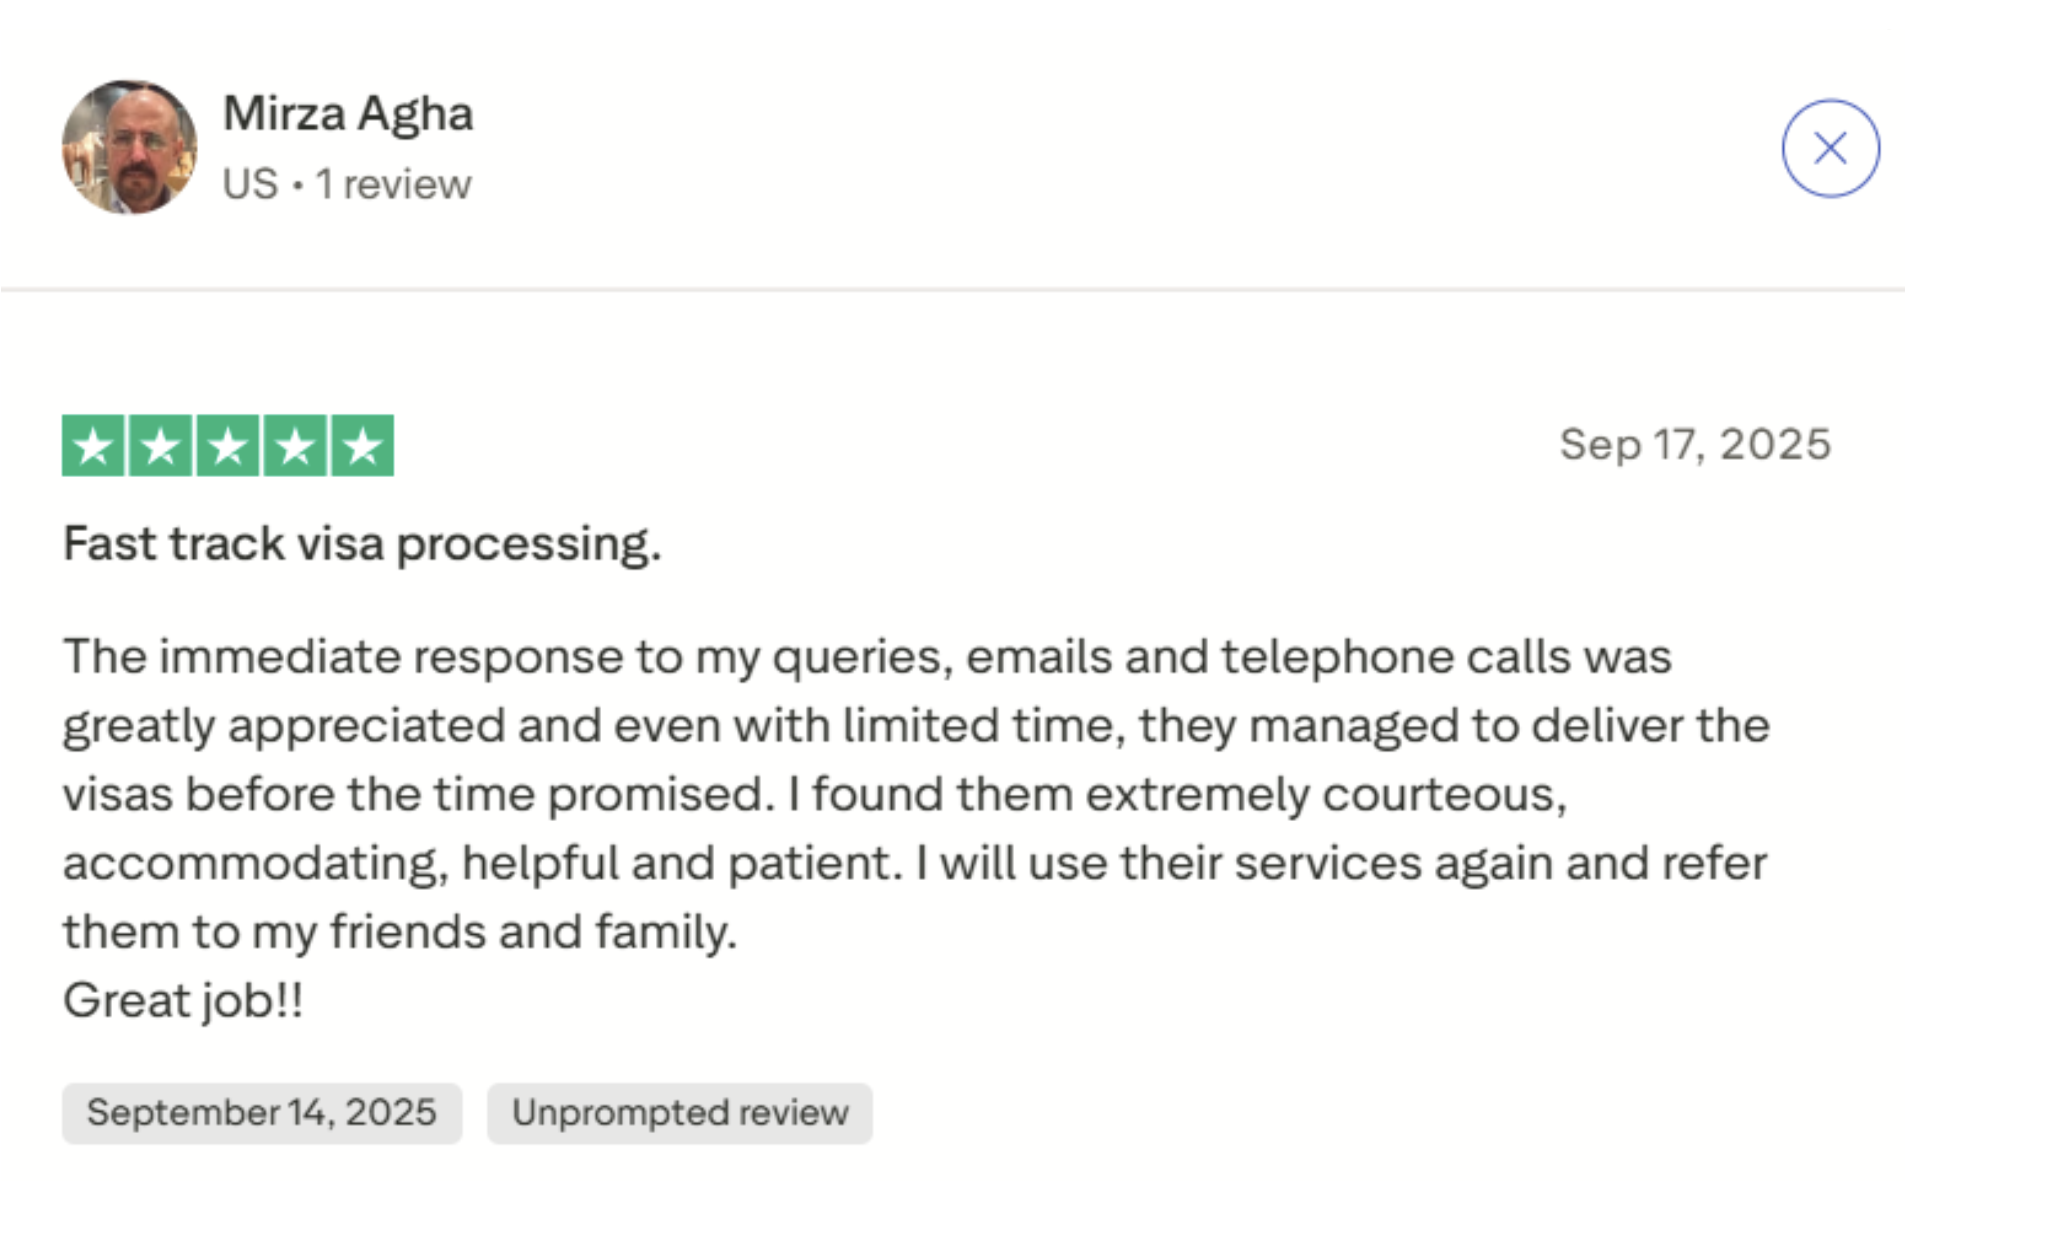
Real Customer Feedback from Tripadvisor (5/5 ratings).
2. Friendly and Professional Support Team
Our commitment to exceptional customer care is one of the top reasons we’ve become the top-rated Vietnam visa support for tourists. That’s why we built a team that speaks your language — literally and culturally.
What our support includes:
24/7 live chat and email assistance
English agents ready to assist you
Clear answers to complicated visa-related questions
One customer shared their experience, praising how quickly and efficiently our team handled their request, ensuring a smooth and stress-free process from start to finish.
 We are so grateful and proud to be recognized for our quick response and attentive support
3. Transparent Pricing – No Hidden Fees
Travel budgeting is hard enough without surprise charges. That's why we pride ourselves on offering transparent and competitive pricing. Many travelers note in their customer testimonials for Vietnam visa services that our fees are straightforward, with no hidden costs.
We provide:
Clear breakdowns of fees based on visa type
No last-minute add-ons or rush charges (unless requested)
Honest advice on what’s really necessary for your trip
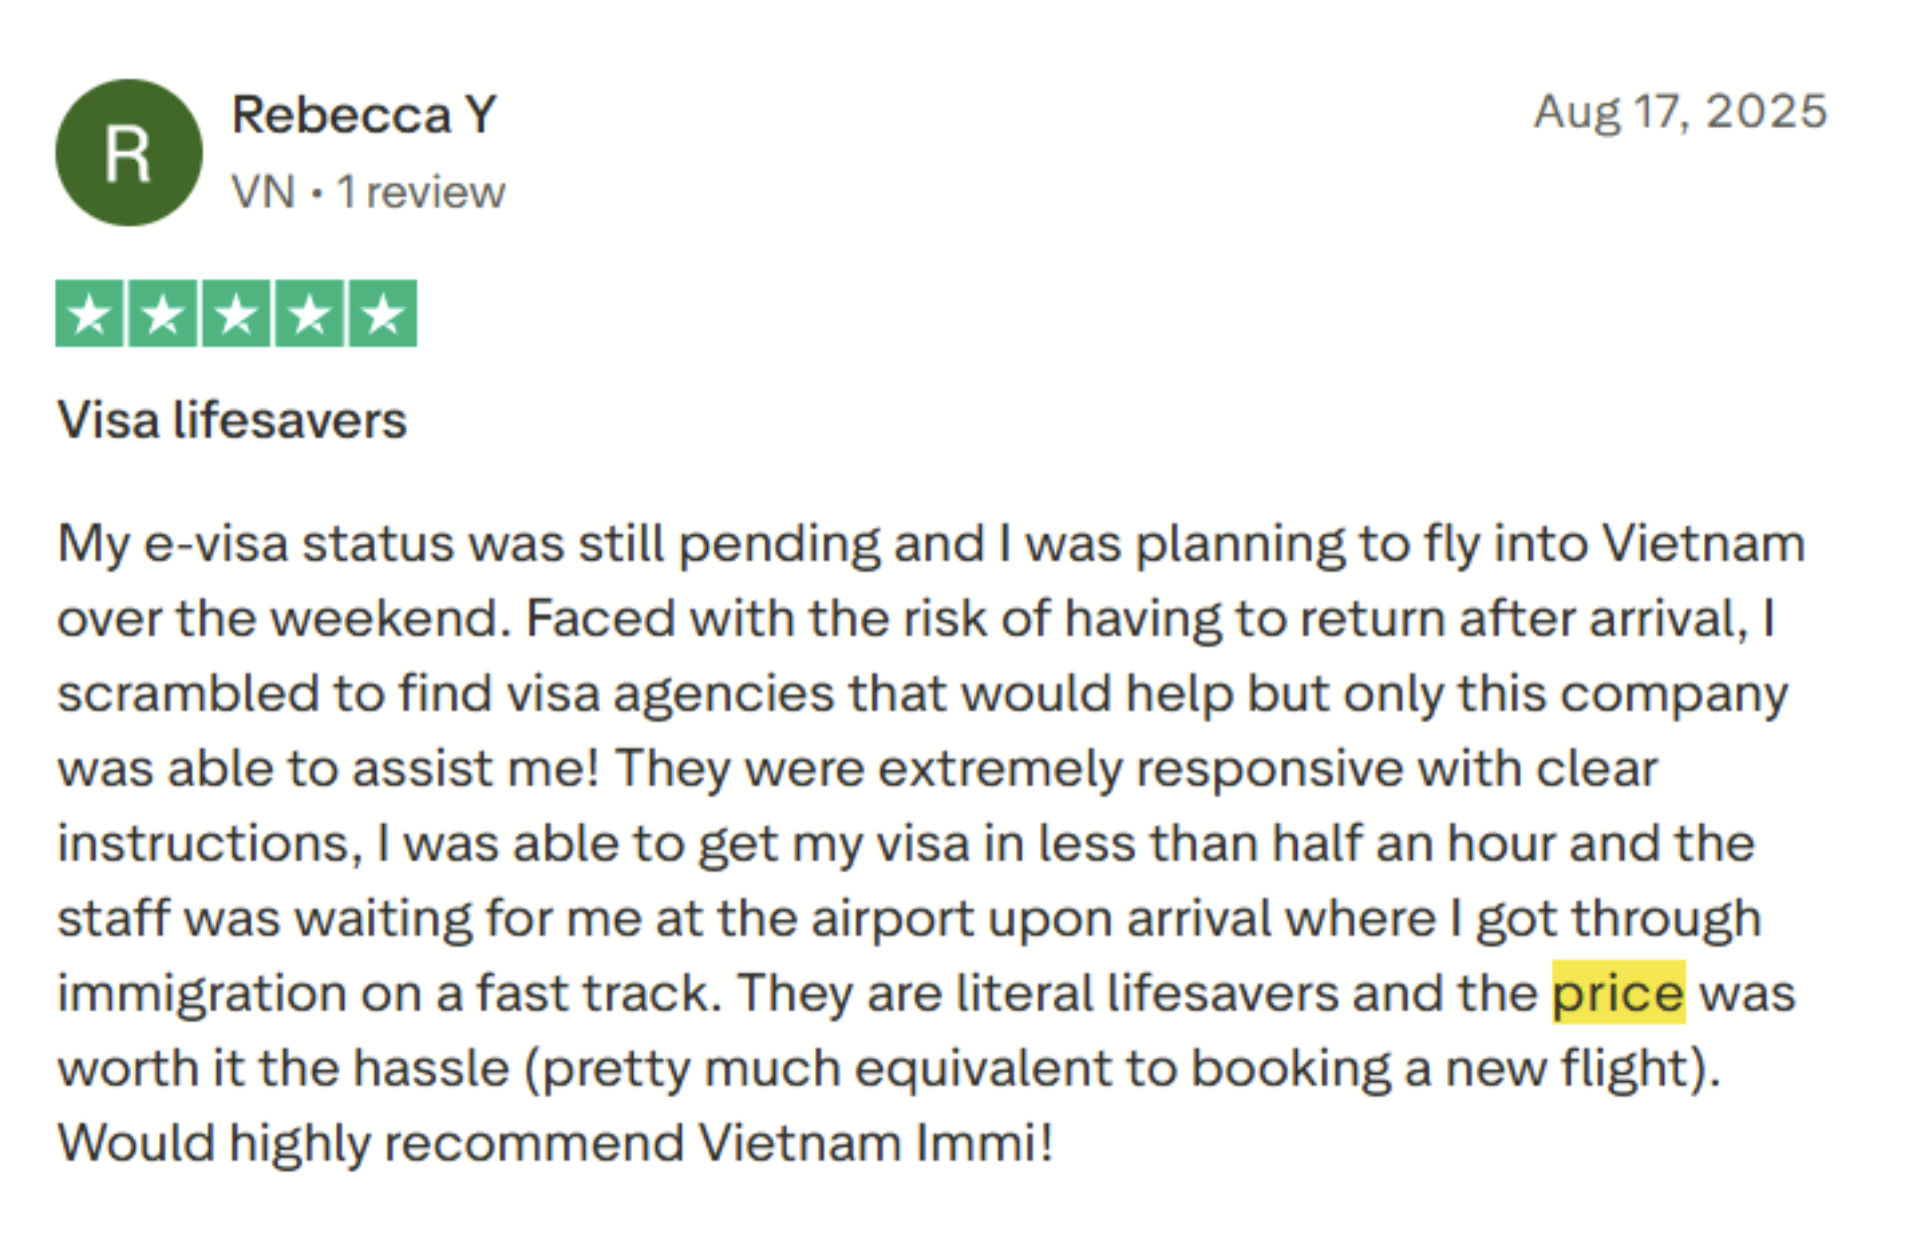
Real Customer Feedback:
4. Trusted by Thousands of Travelers Worldwide
We’re proud to have helped thousands of tourists, business travelers, and digital nomads get their Vietnam visas with ease. That reputation is backed by hundreds of 5-star Vietnam visa service reviews across platforms like Google, Trustpilot, and social media.
Our reputation is built on:
Consistent positive customer experiences
High approval rates for visa applications
Repeat clients who trust us every time they visit Vietnam
With so many agencies offering visa services, you might wonder: what makes ours different?
Here’s a quick summary:
Global support: We serve travelers from 100+ countries
All visa types covered: Tourist, business, e-visa, and more
High satisfaction rate: Verified 5-star Vietnam visa service reviews
Human-centered approach: We're not just a system — we’re a team
From your first inquiry to your arrival at a Vietnamese airport, we’re by your side every step of the way.
In conclusion
If you're planning a trip to Vietnam, choosing the right visa assistance can make all the difference. From quick processing to transparent pricing and genuine customer care, we strive to be the best Vietnam visa service for every type of traveler.
Still unsure? Just check out the countless customer testimonials for our Vietnam visa service and see what travelers just like you are saying.
Contact us and let us know your travel plans! Whether you’re coming for leisure or business, our team is here to support you with the latest Vietnam visa updates, urgent visas, and Fast Track airport services.
Photo: Collected
Last Updated: Monday April 20, 2026
Planning a trip to Vietnam is exciting, but travel plans can be unpredictable. You might find a cheaper flight a day earlier or decide to extend your stay in beautiful Da Nang. But here is the big question: Can you change entry or exit dates after getting a Vietnam eVisa?
Understanding the strict regulations of the Vietnam Immigration Department is crucial to avoid being denied boarding or facing issues at the border.
1. Can You Modify an Issued Vietnam eVisa?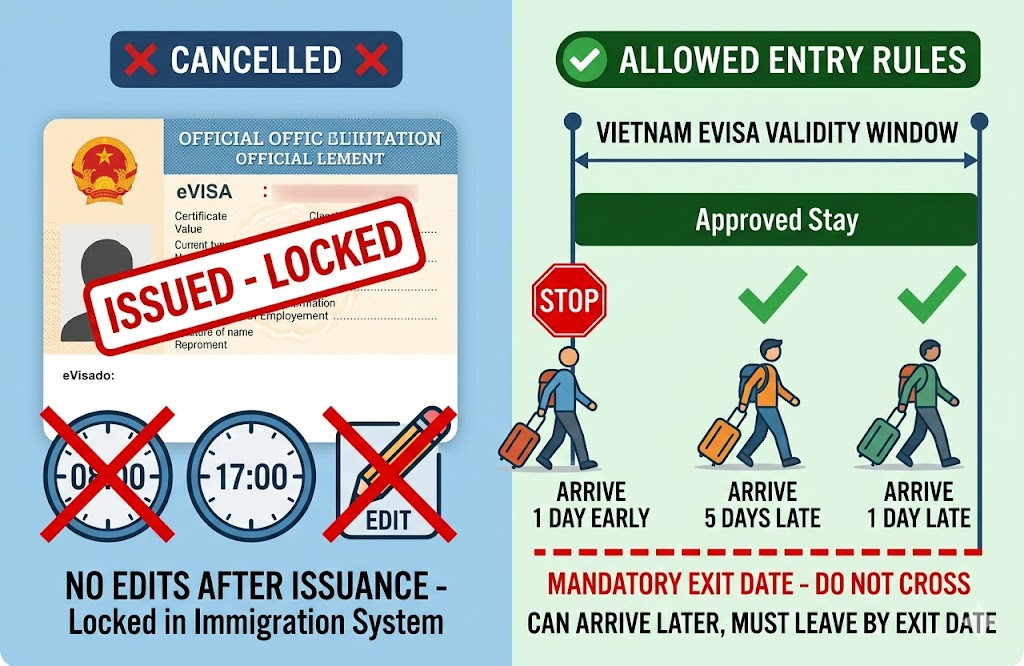
The short and firm answer is No. Once a Vietnam eVisa has been issued and the PDF file is generated, the information is "locked" in the Immigration Department’s system.
The Vietnam eVisa is a legal document linked to your passport number. Any modification—whether it is a typo in your name or a change in your visa validity vs travel dates—requires a completely new legal assessment. There is no "edit" button on the official portal for an approved visa.
If your flight lands on a date not covered by your visa, you will likely face a visa date mismatch issue. Airline staff are trained to check these dates strictly; if your visa starts on the 10th but your flight arrives on the 9th, you will not be allowed to board the plane.
Can you arrive on a different day than what is printed on your visa? The answer depends on whether you are early or late.
You cannot enter Vietnam before the "Grant of Entry" date stated on your eVisa.
The Rule: If your visa starts on October 1st, you cannot pass through immigration on September 30th.
The Solution: You must change visa entry date by applying for a new eVisa or changing your flight to match the visa.
This is perfectly allowed.
The Rule: You can enter Vietnam any time after the start date, as long as you leave before the expiry date.
Example: If your visa is valid from Oct 1st to Oct 30th, you can enter on Oct 5th. However, your exit date remains Oct 30th—it does not get pushed back.
Your visa exit date change is much stricter than the entry date.
The visa validity period explained simply: It is the window between your "Entry" and "Exit" dates. You must be out of the country by midnight on the expiry date.
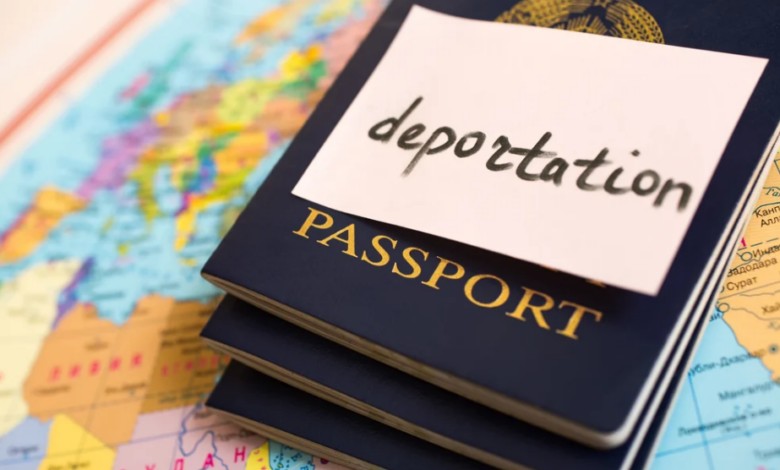
Overstaying: Staying even one day past your visa exit date can lead to heavy fines, "blacklisting," or deportation.
Applying for a New Visa: If you want to stay longer, the most common way now is a "visa run" (exiting and re-entering with a new eVisa), as internal extensions are currently very limited.
If you realize your travel dates don't match your visa, don't panic, but act fast.
If you need to enter earlier than the visa allows.
If your stay will exceed the exit date printed on the visa.
If you entered the wrong year or month by mistake.
When applying, many frequent travelers set their entry date a few days earlier than planned and their exit date for the full 90 days allowed. This provides flexibility without needing to change visa entry date later.
For professional assistance and fast-track processing to fix date errors, visit Vietnam-Immi.org for expert support.